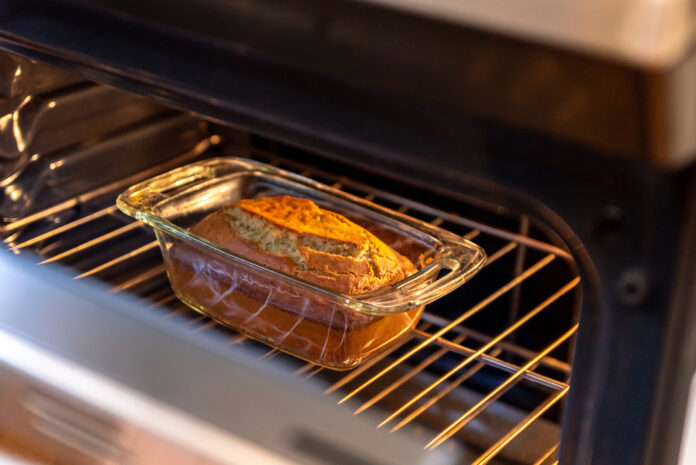
There’s something undeniably comforting about the aroma of freshly baked bread wafting through your home. Baking bread from scratch is rewarding and brings wholesome ingredients to your table. This guide walks you through how to make perfect homemade bread — even if you’ve never baked before.
Why Bake Your Own Bread?
When you bake your own bread, you know exactly what goes into it. Unlike store-bought loaves filled with preservatives, homemade bread offers higher quality and freshness. Plus, it’s a cost-effective way to enjoy artisan bread at home. Many people are turning to homemade bread because they value quality over convenience, and with this guide, you will too.
Essential Ingredients
Making bread requires just a few basic pantry staples:
- Warm Water: Activates the yeast.
- Sugar or Honey: Feeds the yeast and adds a subtle sweetness.
- Active Dry Yeast: The leavening agent that makes the bread rise.
- Flour: All-purpose or bread flour works best; bread flour gives a slightly chewier texture.
- Salt: Enhances flavor.
- Oil or Butter: Adds richness and moisture.
Note: Always use fresh yeast for best results. Inactive or expired yeast may prevent your bread from rising properly.
Equipment You’ll Need
- Large mixing bowl
- Measuring cups and spoons
- Wooden spoon or stand mixer with dough hook
- Clean kitchen towel
- Two loaf pans
- Oven
Step-by-Step Guide to Baking Bread
1. Activate the Yeast
Begin by pouring 2 cups of warm water into your mixing bowl. The water should be warm to the touch but not hot. Stir in 2 tablespoons of sugar until dissolved. Sprinkle 1 ½ tablespoons of active dry yeast over the water and let it sit for about 5 minutes until it becomes foamy.
Using fresh yeast is crucial as it ensures a good rise in your bread.
2. Mix the Dough
Add 1 teaspoon of salt and ¼ cup of oil or melted butter to the yeast mixture. Gradually stir in 5-6 cups of flour, one cup at a time, until the dough starts to pull away from the sides of the bowl.
3. Knead the Dough
Turn the dough out onto a floured surface. Knead it for about 7-10 minutes until it’s smooth and elastic. If the dough is too sticky, add a little more flour; if it’s too dry, add a tablespoon of water.
4. First Rise
Place the dough in a greased bowl, turning it once to grease the top. Cover with a clean kitchen towel and let it rise in a warm place for about 1 hour or until doubled in size.
Patience during the rise is key to achieving soft, fluffy bread.
5. Shape the Loaves
Punch down the risen dough to release air bubbles. Divide it into two equal parts. Shape each portion into a loaf and place them into greased loaf pans.
6. Second Rise
Cover the loaf pans with the kitchen towel and let the dough rise again for about 30-40 minutes, or until the dough has risen about 1 inch above the pans.
7. Bake the Bread
Preheat your oven to 350°F (175°C). Bake the loaves for 30-35 minutes or until the tops are golden brown. The bread should sound hollow when tapped.
Using a thermometer can ensure perfect baking; aim for an internal temperature of 190-200°F.
8. Cool and Enjoy
Remove the loaves from the oven and brush the tops with melted butter for a soft crust. Let them cool in the pans for 10 minutes before transferring to a wire rack to cool completely.
Tips for Perfect Bread Every Time
- Consistency is Key: The dough should be slightly tacky but not sticky. Adjust with small amounts of flour or water as needed.
- Environment Matters: If your kitchen is cold, the dough might take longer to rise. Find a warm spot or preheat your oven to the lowest setting, then turn it off and let the dough rise inside.
- Experiment with Flavors: You can add herbs, cheeses, or nuts to customize your bread. Some bakers love adding rosemary and olive oil for extra flavor.
Storing Your Homemade Bread
Homemade bread doesn’t contain preservatives, so it won’t last as long as store-bought bread. Store it in a sealed bag at room temperature for up to 5 days. If you won’t finish it within that time, consider slicing and freezing the bread. It can last in the freezer for up to 3 months.
Frequently Asked Questions
Can I use whole wheat flour instead of all-purpose flour?
Yes, you can substitute some or all of the all-purpose flour with whole wheat flour. Keep in mind that whole wheat flour may make the bread denser. You might need to adjust the amount of liquid in the recipe.
What if I don’t have a loaf pan?
You can shape your bread into a round loaf and bake it on a baking sheet. This is often referred to as a free-form loaf.
How do I know if my yeast is still good?
If your yeast doesn’t foam during the activation step, it might be inactive. Always check the expiration date on your yeast, and store it in a cool, dry place.
Conclusion
Baking bread from scratch is a simple pleasure that yields delicious results. With just a few ingredients and some patience, you can create loaves that are far superior to what you find in stores. So roll up your sleeves, dust off that mixing bowl, and start baking your perfect homemade bread today!
Happy baking!


