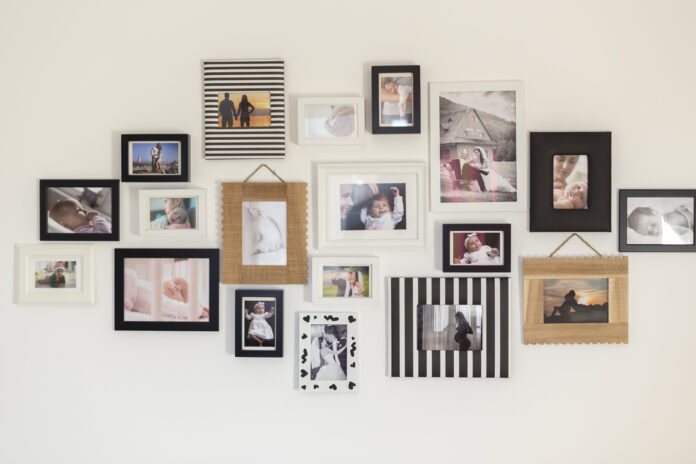
Creating a gallery wall is a wonderful way to showcase your family’s memories and personal style, transforming empty walls into meaningful art displays. Whether you’re combining family photos, artworks, or cherished mementos, a gallery wall adds character and warmth to your home.
Step 1: Planning Your Gallery Wall
Choosing a Location
The first step in creating a gallery wall is selecting the ideal location in your home. Popular spots include long hallways, above the couch, around a television, along staircases, or in an office space. These areas enhance the decor by providing visual interest and help fill empty spaces. For example, a long hallway is perfect for displaying a series of family photos, creating a journey through your family’s milestones as guests walk through your home.
Selecting a Style
Decide on the overall style of your gallery wall. Do you prefer a uniform look with consistent frame styles and sizes, or an eclectic mix of frames and artwork? A uniform style promotes a cohesive look and can be expanded over time, while an eclectic style allows for personal expression but requires more thorough planning.
Step 2: Selecting Your Photos and Art
Choose photos and artworks that hold special meaning to you and your family. Your gallery wall can include family portraits, candid snapshots, travel photos, children’s artwork, and even pieces from local artists. When selecting art, consider opting for a mix of styles to add depth and interest. Mixing portrait and landscape orientations can create a dynamic and engaging display.
Step 3: Choosing Frames and Mats
The frames you choose play a significant role in the overall look of your gallery wall. You can select frames that are all the same color and style for a unified appearance, or mix different frame styles to add variety and character. Consider using frames of different materials, such as wood and metal, and colors that complement your home’s decor.
Adding mats to your photos can enhance their presentation. Mats provide a visual buffer between the image and the frame, drawing attention to the photo. Strategic selection of mats can elevate your photo presentation.
If you’re looking for high-quality frames, there are many options available. For instance, Framebridge offers custom frames that simplify the process by providing ready-to-hang frames along with a template for easy installation.
Alternatively, thrift stores and secondhand shops are great places to find unique frames. Shopping secondhand not only saves money but is also eco-friendly.
Step 4: Planning the Layout
Before you start hammering nails into the wall, it’s crucial to plan your layout.
Mapping Out the Arrangement
Lay out your frames on the floor to experiment with different arrangements. You can also trace the shape of each frame onto paper and tape the templates onto the wall to visualize the layout.
If you’re going for a symmetrical grid layout, precise measurements and consistent spacing are essential. Use a tape measure and a level to ensure everything lines up perfectly.
For a more eclectic arrangement, start with the largest piece in the center and build outward, mixing different sizes and orientations to create a balanced yet dynamic display.
Using Technology
Take advantage of technology to assist in planning. Apps like the Measure app on iPhones can help with accurate measurements, and other apps allow you to preview art arrangements in real size.
Step 5: Hanging Your Gallery Wall
Once you’ve finalized your layout, it’s time to hang your frames.
Preparing the Wall
Consider the lighting in the chosen area. Both natural and artificial light can cause glare on framed photos. Using materials like Optium Museum Acrylic can minimize glare and protect your photos from UV damage.
Hanging Techniques
Use appropriate hanging hardware to ensure your frames are securely mounted. For renters or those who prefer not to put holes in the wall, Command Strips are a great alternative. They allow you to make adjustments easily without damaging the wall.
When hanging, start from the center of your layout and work outward. Use a spirit level to ensure frames are well-aligned, maintaining consistent gaps and eye lines for a polished look.
Tips and Tricks
- Incorporate Personal Elements: Adding personal touches like upcycled sentimental fabrics as backdrops can make your gallery wall even more meaningful.
- Vary Your Art: Don’t be afraid to mix in different types of art, such as paintings, sketches, or even three-dimensional objects for extra dimension.
- Embrace Imperfection: Remember, your gallery wall should reflect your personal style and story. It’s okay if it’s not perfect. Embracing imperfection can lead to progress in sustainable living.
- Tell a Story: Use your gallery wall to portray cherished family memories and shared stories, turning your wall into a storytelling canvas.
- Professional Assistance: If you’re uncertain about the design or installation, consider consulting a professional photographer or interior designer. Services like Reflections Photography offer custom gallery wall designs, including photo sessions and installation.
Conclusion
Creating a gallery wall with family photos and art is a rewarding project that adds personality and warmth to your home. By carefully selecting your images, planning your layout, and considering frames and lighting, you can design a stunning display that celebrates your family’s stories and style. So gather your cherished photos and artwork, and start creating a gallery wall that your family and friends will love.


