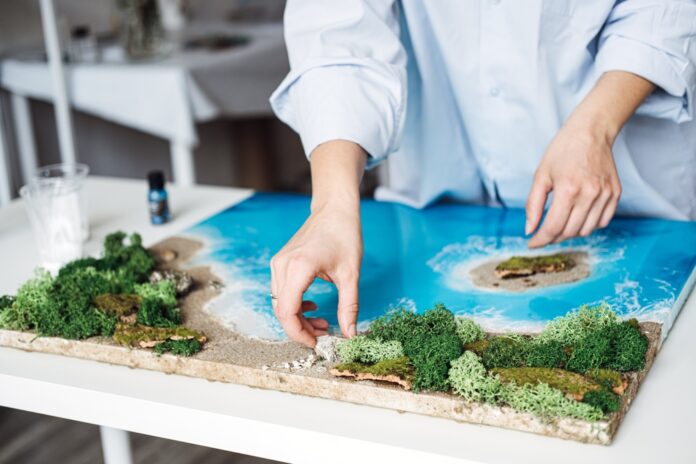
Resin art has become a captivating way to express creativity by transforming ordinary objects into mesmerizing works of art. Whether you’re a seasoned artist or a beginner looking to explore a new medium, creating resin art pieces can be both rewarding and enjoyable. This guide will walk you through the essential steps and tips to help you craft stunning resin artworks that reflect your unique style.
Gathering Your Materials
Before diving into your resin art project, it’s crucial to prepare all the necessary materials:
- Epoxy Resin and Hardener: Choose a high-quality, clear epoxy resin that cures to a glossy finish.
- Protective Gear: Wear nitrile gloves and safety glasses to protect your skin and eyes while working with resin.
- Mixing Supplies: Use disposable plastic cups for mixing and stirring sticks (like large Popsicle sticks) to combine the resin and hardener.
- Colorants and Additives: Select acrylic paints, mica powders, glitters, or other pigments to add color to your resin.
- Canvas or Substrate: Pick a surface such as a painting canvas, wood panel, or artboard to apply your resin.
- Heat Gun or Torch: A heat gun helps in removing bubbles from the resin and creating unique effects.
- Workspace Protection: Cover your work area with plastic sheeting or newspaper to catch any spills.
Starting with the right materials sets the foundation for a successful project. Remember to work in a well-ventilated area and keep your workspace clean to avoid dust settling into your resin.
Preparing Your Workspace
Creating a suitable environment is essential for resin art:
- Level Surface: Ensure your worktable is level so the resin spreads evenly.
- Ambient Temperature: Work in a room that’s around 70°F (21°C) for optimal curing.
- Dust-Free Zone: Minimize movement and close windows to reduce dust particles.
- Safety First: Always wear protective gloves and goggles to prevent skin irritation and protect your eyes.
Proper preparation prevents unwanted flaws in your finished piece and ensures a smoother creative process.
Mixing the Resin
Accurate mixing is a critical step:
- Measure Carefully: Combine equal parts of resin and hardener according to the manufacturer’s instructions.
- Stir Thoroughly: Mix slowly for at least 2-3 minutes to blend completely and avoid introducing excess bubbles.
- Divide and Conquer: Pour the mixed resin into separate cups if using multiple colors.
- Add Colors: Mix in your chosen pigments until you achieve the desired hue and opacity.
Taking the time to mix properly ensures that your resin cures correctly and your colors remain vibrant.
Designing Your Artwork
Now comes the fun part—creating your design:
- Base Layer: Start by pouring a thin layer of clear or colored resin onto your canvas to serve as the background.
- Adding Colors: Pour additional colored resins onto the base layer, experimenting with different pour techniques like puddles, swirls, or lines.
- Creating Effects: Use a heat gun to gently move the resin, blend colors, and eliminate air bubbles. This tool also helps in forming cells and unique patterns.
- Embellishments: Incorporate elements like glitter, pressed flowers, or metallic flakes to add texture and interest.
Feel free to experiment with different techniques to discover what you enjoy most. Resin art is all about creativity and personal expression.
Tips for Stunning Results
- Plan Your Design: Having a clear idea of your desired outcome can guide your color choices and techniques.
- Color Harmony: Choose colors that complement each other to create a cohesive piece.
- Mind the Clock: Resin has a limited working time (pot life), so work efficiently but don’t rush.
- Flow Catalysts: Consider using a flow agent if you’re adding heavier materials to ensure they disperse evenly.
By paying attention to these details, you’ll enhance the overall quality and appeal of your artwork.
Curing Your Art
After completing your design:
- Cover Your Piece: Protect your artwork from dust by covering it with a box or a dedicated resin tent.
- Curing Time: Allow the resin to cure undisturbed for at least 24 hours, depending on the product’s instructions.
- Avoid Touching: Resist the temptation to touch the surface during curing to prevent fingerprints or dents.
Patience during the curing process is essential to achieve a flawless finish.
Finishing Touches
Once your resin art is fully cured:
- Inspect for Flaws: Check for any imperfections like drips or rough edges.
- Sanding and Polishing: Gently sand any uneven areas and polish the surface if desired for extra shine.
- Display: Your stunning resin art is now ready to be displayed or gifted!
Taking the time to finish your piece properly enhances its professionalism and longevity.
Safety Considerations
Working with resin requires attention to safety:
- Ventilation: Always work in a well-ventilated area to avoid inhaling fumes.
- Protective Equipment: Consistently wear gloves and a mask to protect your skin and lungs.
- Read Instructions: Follow all safety guidelines provided by the resin manufacturer.
By prioritizing safety, you ensure that your art practice remains a healthy and enjoyable activity.
Inspiration and Continuous Learning
Resin art is a continually evolving field with endless possibilities:
- Explore Techniques: Try different methods like dirty pours or using dispersion agents to create unique effects.
- Learn from Others: Join resin art communities online to share experiences and gain insights.
- Stay Informed: Keep up with new products and trends to expand your repertoire.
Embracing a mindset of exploration will keep your art fresh and exciting.
Creating stunning resin art pieces is both an accessible and fulfilling endeavor. With the right materials, careful preparation, and a dash of creativity, you can produce artworks that are not only beautiful but also uniquely yours. So gather your supplies, prepare your workspace, and let your artistic journey begin!


