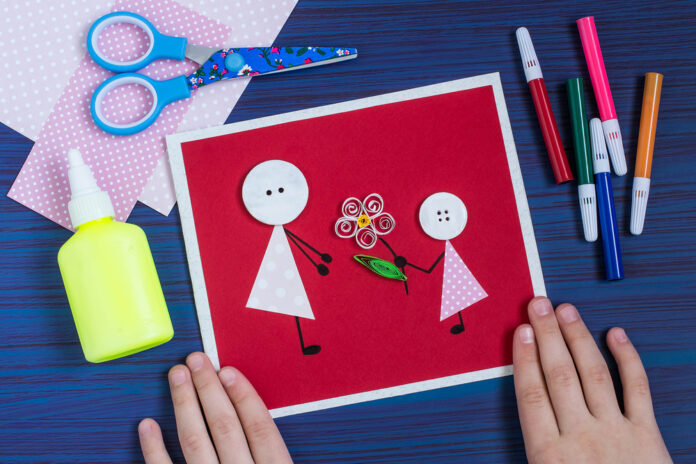
In a digital age where messages are sent with the tap of a screen, there’s something profoundly touching about receiving a handmade greeting card. Creating your own cards not only allows you to express your creativity but also brings joy and thoughtfulness to the recipient. Whether you’re a seasoned crafter or a beginner looking to start a new hobby, making beautiful handmade greeting cards is an accessible and rewarding endeavor.
Why Make Handmade Greeting Cards?
Handmade cards offer a personal touch that store-bought cards simply can’t match. They become cherished keepsakes, reflecting the time and effort you’ve invested. Crafting cards can also be a therapeutic activity, providing relaxation and a sense of accomplishment. Plus, it’s a fun way to engage children in creative projects, fostering their artistic skills.
Getting Started: Materials You Need
Before diving into card making, it’s essential to gather the right materials. Starting with high-quality supplies ensures great results and makes the crafting process more enjoyable.
Essential Materials:
- Cardstock or Heavy Construction Paper: The foundation of your card.
- Adhesives: Glue sticks, double-sided tape, or multipurpose liquid glue.
- Cutting Tools: Scissors and a paper trimmer for precise cuts.
- Decorative Elements: Ribbons, stickers, sequins, or designer series paper.
- Writing Utensils: Markers, pens, or calligraphy tools.
- Stamp Sets and Ink Pads: For adding images and sentiments.
- Clear Blocks for Stamps: If using clear or photopolymer stamps.
- Simply Shammy or Stamp Cleaner: To clean your stamps after use.
Starting with high-quality paper ensures great results, so invest in good cardstock and coordinating materials.
Step-by-Step Guide to Making Your Card
1. Choosing Your Design
Begin by selecting a theme or occasion for your card, such as birthdays, holidays, or thank-you notes. Versatile stamp sets with bold images and included greetings are ideal for beginners.
2. Preparing Your Card Base
Fold your cardstock in half to create the card base. For a crisp, clean fold, use a ruler and gently score the fold line before folding. Using common household items like a butter knife can help achieve a clean crease.
3. Adding Decorative Elements
Decorate the front of your card using your chosen materials:
- Stamping: Use stamps and ink pads to add images and sentiments.
- Embellishments: Attach ribbons, stickers, or sequins for added flair.
- Paper Layers: Add layers of patterned paper or contrasting cardstock for depth.
- Techniques: Experimenting with different techniques like watercolor effects or glitter application can add artistic flair.
4. Personalizing the Message
Inside the card, write your personal message. Draft your message with a pencil first before tracing with a calligraphy pen or marker to ensure neatness and avoid mistakes.
5. Final Touches
Make sure all glue and ink are dry before handling the card further. Place it in an envelope, and consider decorating the envelope to match. Adding final touches like writing the recipient’s name on the envelope adds an extra personal touch.
Tips for Beginners
Starting a new hobby can be overwhelming, but with these tips, you’ll be crafting like a pro in no time.
- Start Simple: Using the SIP method—Stamps, Ink, Paper—is essential for beginners. Focus on these basics before investing in more advanced tools.
- Quality Over Quantity: Invest in a few high-quality supplies rather than many lesser-quality items.
- Learn from Others: Anna Helman offers various resources for learning cardmaking, including written tutorials and YouTube video series. Following tutorials can help you learn new techniques and gain inspiration.
- Budget-Friendly Options: Consider using pre-made card kits like Paper Pumpkin, which provide all the materials you need. Paper Pumpkin is a monthly subscription service that provides all needed materials.
- Host a Crafting Party: Gathering friends for a card-making session can be both fun and inspiring. Hosting stamping parties, both virtual and in-person, can enhance your experience.
Exploring Advanced Techniques
Once you’re comfortable with the basics, try incorporating advanced techniques into your cards:
- Fun Folds: Create cards with unique folds and shapes for added interest.
- Embossing: Add raised designs using embossing tools and powders.
- Coloring Techniques: Use watercolors or alcohol markers to add depth to stamped images.
- Die-Cutting: Invest in a die-cutting machine to create intricate shapes and designs.
Joining the Cardmaking Community
Cardmaking is not just a hobby; it’s a community. Engaging with others can provide inspiration and support.
- Online Groups: Join Facebook groups like Handmake with Love to connect with fellow crafters.
- Workshops and Classes: Attend workshops to learn new techniques and meet other enthusiasts.
- Social Media: Follow cardmakers on platforms like Instagram and Pinterest for endless ideas.
- Stampin’ Up! Demonstrators: Anna Helman and Jackie Bolhuis are experienced demonstrators who offer resources and support.
Anna encourages involvement in the crafting community through social platforms, emphasizing the joy and creativity that comes from sharing your passion with others.
Conclusion
Crafting beautiful handmade greeting cards is a fulfilling hobby that brings joy to both the creator and the recipient. With a few essential supplies and some creativity, you can start producing cards that are as unique as the people you give them to. Remember, the most important aspect of cardmaking is the personal touch and love you put into each creation.


